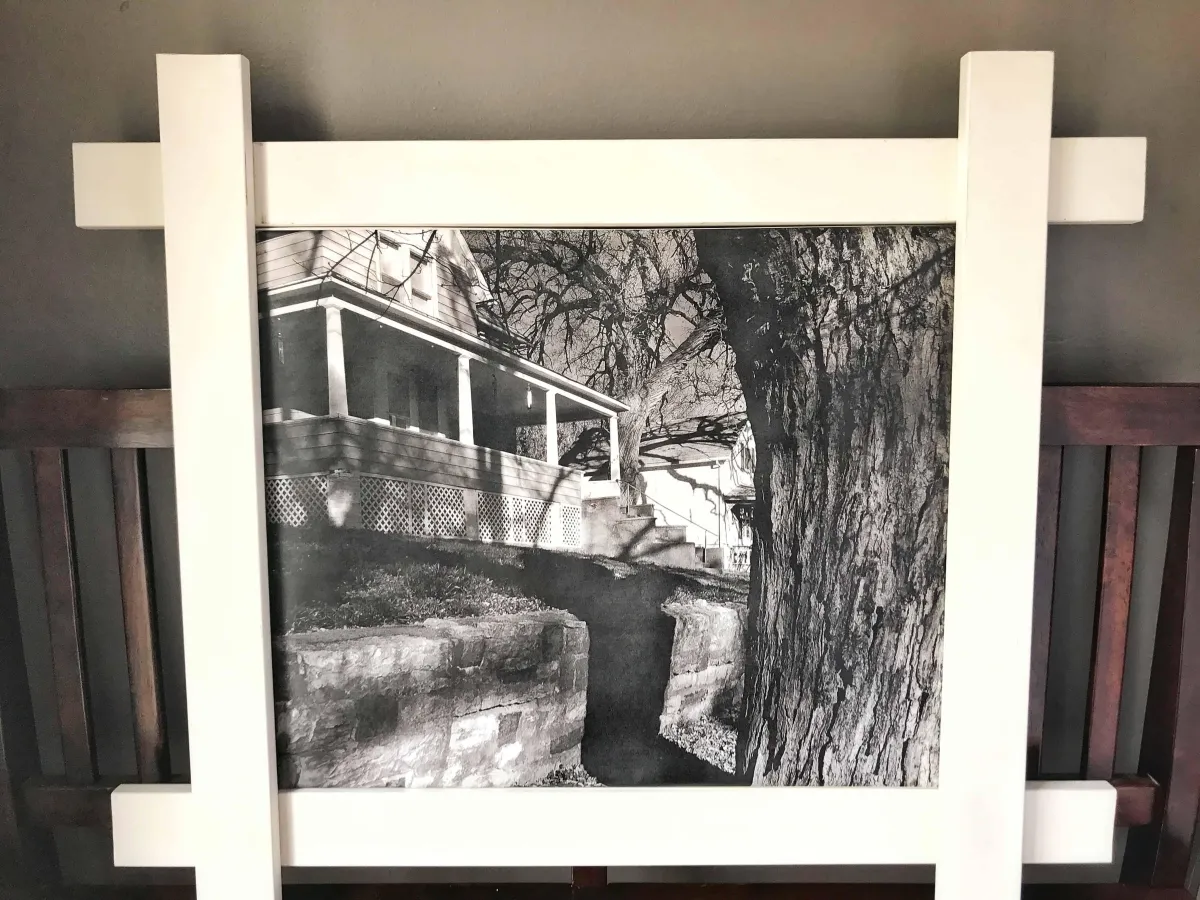
Say Goodbye to Boring Walls with These Easy Canvas Frames!
This DIY canvas frame is super easy to make, customizable, and isn’t like the traditional frames you’re used to seeing. Which is why I love it.
If this look is what you want in your space, you’ve come to the right place.
If there are two things I love, it is getting something on the cheap and spending minimal effort to attain said thing. If they go hand in hand, even better!
We have nine-foot ceilings in our home, which means a lot of walls to cover. I don’t exactly have a decorating budget so when I come across an idea that I can make my own, with little investment of both time and money, you can bet I will give it a shot.
Here’s the breakdown of how to make an easy art canvas and the frame:
Some of the links in this post may be affiliate links, you can read my full disclosure here or look for more information at the bottom of this post.
SUPPLIES:
Canvas Panels (Buying these in a pack will save you the most money.)
Engineering Prints (I’ll explain this in a minute.)
Stapler
Trim (Whatever size/design you wish.)
Nails (Size depends on your trim.)
Paint (You only need this if you don’t buy pre-painted trim.)
STEP 1: Choose Prints
We used to print engineering prints for super cheap, but stores have caught on to us and no longer allow non-engineers to print engineering prints.
Which is a huge bummer. Because any alternatives I have found are at least twice what I used to pay.
However, there are still some affordable options available through places like Walmart or Walgreens, which often have sales on their prints. Or you can print at home if you are doing a smaller print.
Depending on the size of the print you want, you can also find some affordable options through Etsy.
STEP 2: Preparing the Artwork
Once you have your print, decide if it will be vertical or horizontal then choose how you want it aligned on your canvas. Once you have it where you want it, trim the edges leaving a good two to three extra inches on each side.
Carefully cut out a square at each of the corners for easier wrapping of the print around the canvas.
Once that is done, take one side at a time and staple it to the frame of the canvas. Repeat this step on all sides, careful to keep the print wrinkle-free.
STEP 3: Seal Artwork
If you are happy with your piece, then you are ready to seal. There are some who use regular Mod Podge but I find it crinkles the paper too much. If you are going for a textured look then Mod Podge is the perfect medium! I actually made a very large art piece for my husband with mod podge and it looked awesome!
For this piece, however, I did not want a textured look so I opted for the spray instead.
Before spraying, you are going to want to place your piece outside like this:
Do not lay the canvas flat or build-up from the nozzle will drip on your picture. Ask me how I know…
STEP 4: Build the Frame
This is probably the easiest part of the project. 🙂 We used white trim so I didn’t paint it, although I still might as it does not hold up well when you need to wipe it down.
I asked Steve to overlay the trim pieces instead of going with the traditional frame look and I love how it turned out. He laid the sideboards upside-down along with the canvas then tacked the top and bottom boards at the points where they cross with the sideboards.
Like this:
Make sure the nails you use are not too long or they will poke through. But you want them long enough to keep the boards together. Of course, you can always use glue instead of nails.
Now you are ready to pop your art into your frame. Super easy.
The canvas fits snug between two boards which allows you to swap out pictures easily.
For Christmas, you could even wrap the canvas in wrapping paper for an effortless decorating touch that doesn’t need storing afterward. 🙂
Here is the finished look.
Here are two pieces already hanging up.
And we added them to our super high stairwell wall that was just bare and ugly but now makes me smile.
And that’s it! Super easy and inexpensive to make. I think my favorite thing about this project is the sentimental value it adds to our home. (The pictures are architectural aspects of my childhood home.)
If you give this a try, I’d love to see your pictures in the comments!
*As an Amazon Associate, I earn from qualifying purchases, but if I am recommending an item in my post, it is only because I have used it myself or have done enough research on the product to feel it is a good fit for my readers.
© 2023 Freedomkit | Powered by Freedomkit.ai

