Parenting

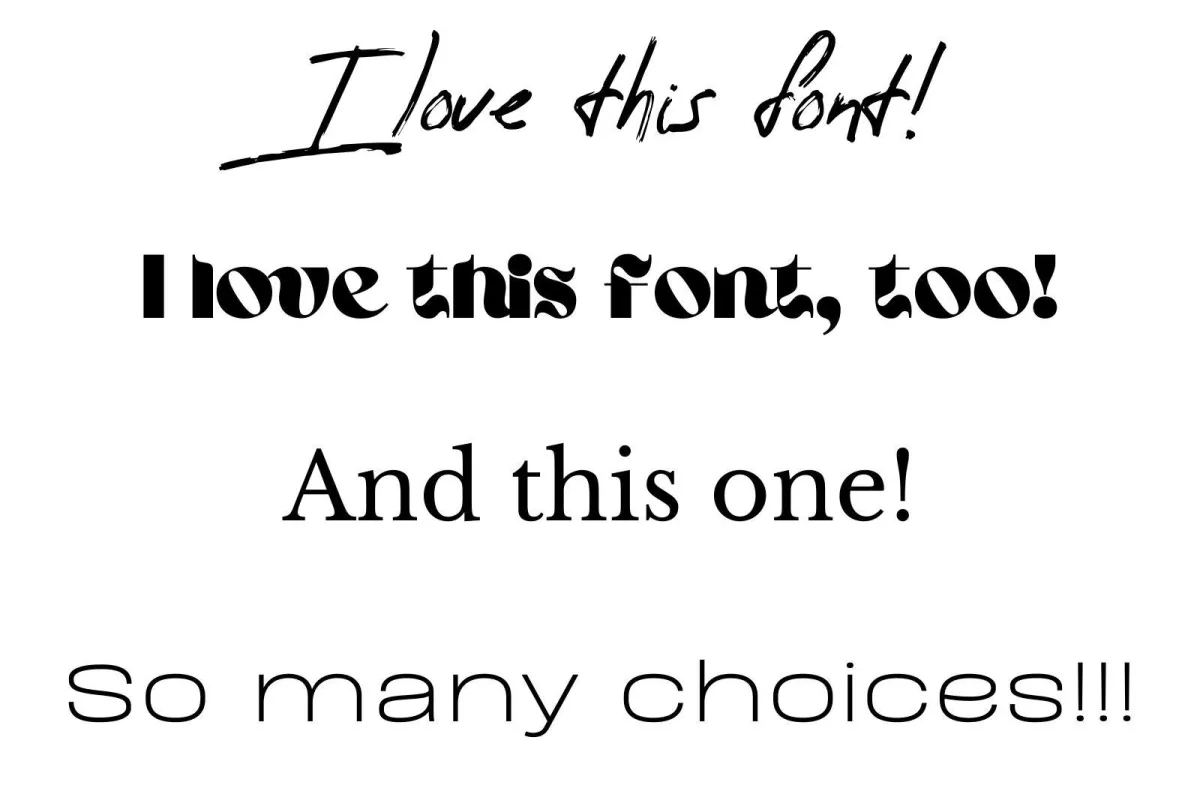
different types of fonts displayed

Boring Fonts No More: Spice Up Your PowerPoint with New Styles!

November 03, 20223 min read

PowerPoint has tons of awesome fonts to choose from in their software, but when you are a creator and making a very specific design, you’re going to want a unique font to match. That’s when you go online and buy one you love, but then what? How do you get that font uploaded onto PowerPoint?

In this post, I’m going to walk you through the pretty easy process using screenshots, but first, if you aren’t sure where to get fonts in the first place, let me give you a couple of places I use.

(I sometimes include affiliate links, which means I might make a small commission off any purchases you make, at no additional cost to you. You can read my full disclosure here.)

For free fonts, Font Squirrel is a great resource. I would check there first. But if you just aren’t finding that perfect font, there are hundreds of unique fonts found on Etsy, Creative Market, or my personal go-to: Creative Fabrica.

How to Upload Fonts in PowerPoint

Ok, now let’s jump into the tutorial. I am going to choose a font in Creative Fabrica and show you how to upload it step-by-step using screenshots. (These screenshots are taken on a PC, so things will look slightly different if you are a MAC user.)

1. Choose a Font

Heading over to Creative Fabrica, I browse their fonts and find one I want to use. In this instance, we’re going to select Simple House.

choose font

2. Download the Font

When you click the font you like, there will be an option to purchase or download the font depending on whether what you chose is free or for purchase. Since I have a monthly subscription that allows me unlimited downloads, I only need to download it.

When you select download, if you have a PC it should start downloading in the bottom left corner.

download font

3. Open your Zipped File

Once your new font is downloaded, head into your “downloads” folder (or click on the downloaded file in the bottom left corner) where you will find a zipped file with the name of your font.

open the zipped file

Right-click on the zipped file and select “Open”.

open the font file

4. Install the Font

When you open your zipped file, there may be a few files inside, depending on what the font creator included in their font design. (For example, if your font comes in plain and bold, there’ll be a file for each.) In this example, there’s only one, so I double-click the file with the font name on it.

Choose the font file

This will open up the font package. In the top left corner is the “Install” button which you will select and a loading window should pop up, like in the pic below.

install the font

5. Design with your New Font

Once you have installed your new font using the steps above, open PowerPoint and add a text box. This will open up the text formatting options where you will find the drop-down font menu. You can either type in the name of your new font in the font search bar or scroll down until you find it. Select it.

find the new font in PowerPoint

If you already had PowerPoint open while you were downloading your font, you will need to close the program down and reopen it before the new font will appear. Don’t forget to save your work as a PowerPoint Presentation before you do!

Conclusion

Uploading a font in PowerPoint is pretty easy, now that you know how to do it. I hope this opens up a whole new avenue of creativity for you. Happy creating!

Related Articles

How to Change Sizes in PowerPoint

Uploading Graphics in PowerPoint Tutorial

PowerPoint Walk-Through

How can I Benefit from Making Printables?

how to install new fonts in powerpointhow to make printables in powerpoint
blog author image

Kimberly McGraw

Kimberly McGraw is an author and online content creator, dedicated to sharing helpful tips with her readers. As a devoted wife and mother of three, she draws inspiration from her daily life to create heartfelt and relatable stories. Her writing reflects her deep commitment to her faith and her passion for encouraging mothers on their own journeys.

Back to Blog

Marriage

different types of fonts displayed

Boring Fonts No More: Spice Up Your PowerPoint with New Styles!

November 03, 20223 min read

PowerPoint has tons of awesome fonts to choose from in their software, but when you are a creator and making a very specific design, you’re going to want a unique font to match. That’s when you go online and buy one you love, but then what? How do you get that font uploaded onto PowerPoint?

In this post, I’m going to walk you through the pretty easy process using screenshots, but first, if you aren’t sure where to get fonts in the first place, let me give you a couple of places I use.

(I sometimes include affiliate links, which means I might make a small commission off any purchases you make, at no additional cost to you. You can read my full disclosure here.)

For free fonts, Font Squirrel is a great resource. I would check there first. But if you just aren’t finding that perfect font, there are hundreds of unique fonts found on Etsy, Creative Market, or my personal go-to: Creative Fabrica.

How to Upload Fonts in PowerPoint

Ok, now let’s jump into the tutorial. I am going to choose a font in Creative Fabrica and show you how to upload it step-by-step using screenshots. (These screenshots are taken on a PC, so things will look slightly different if you are a MAC user.)

1. Choose a Font

Heading over to Creative Fabrica, I browse their fonts and find one I want to use. In this instance, we’re going to select Simple House.

choose font

2. Download the Font

When you click the font you like, there will be an option to purchase or download the font depending on whether what you chose is free or for purchase. Since I have a monthly subscription that allows me unlimited downloads, I only need to download it.

When you select download, if you have a PC it should start downloading in the bottom left corner.

download font

3. Open your Zipped File

Once your new font is downloaded, head into your “downloads” folder (or click on the downloaded file in the bottom left corner) where you will find a zipped file with the name of your font.

open the zipped file

Right-click on the zipped file and select “Open”.

open the font file

4. Install the Font

When you open your zipped file, there may be a few files inside, depending on what the font creator included in their font design. (For example, if your font comes in plain and bold, there’ll be a file for each.) In this example, there’s only one, so I double-click the file with the font name on it.

Choose the font file

This will open up the font package. In the top left corner is the “Install” button which you will select and a loading window should pop up, like in the pic below.

install the font

5. Design with your New Font

Once you have installed your new font using the steps above, open PowerPoint and add a text box. This will open up the text formatting options where you will find the drop-down font menu. You can either type in the name of your new font in the font search bar or scroll down until you find it. Select it.

find the new font in PowerPoint

If you already had PowerPoint open while you were downloading your font, you will need to close the program down and reopen it before the new font will appear. Don’t forget to save your work as a PowerPoint Presentation before you do!

Conclusion

Uploading a font in PowerPoint is pretty easy, now that you know how to do it. I hope this opens up a whole new avenue of creativity for you. Happy creating!

Related Articles

How to Change Sizes in PowerPoint

Uploading Graphics in PowerPoint Tutorial

PowerPoint Walk-Through

How can I Benefit from Making Printables?

how to install new fonts in powerpointhow to make printables in powerpoint
blog author image

Kimberly McGraw

Kimberly McGraw is an author and online content creator, dedicated to sharing helpful tips with her readers. As a devoted wife and mother of three, she draws inspiration from her daily life to create heartfelt and relatable stories. Her writing reflects her deep commitment to her faith and her passion for encouraging mothers on their own journeys.

Back to Blog

Kids/Teens

different types of fonts displayed

Boring Fonts No More: Spice Up Your PowerPoint with New Styles!

November 03, 20223 min read

PowerPoint has tons of awesome fonts to choose from in their software, but when you are a creator and making a very specific design, you’re going to want a unique font to match. That’s when you go online and buy one you love, but then what? How do you get that font uploaded onto PowerPoint?

In this post, I’m going to walk you through the pretty easy process using screenshots, but first, if you aren’t sure where to get fonts in the first place, let me give you a couple of places I use.

(I sometimes include affiliate links, which means I might make a small commission off any purchases you make, at no additional cost to you. You can read my full disclosure here.)

For free fonts, Font Squirrel is a great resource. I would check there first. But if you just aren’t finding that perfect font, there are hundreds of unique fonts found on Etsy, Creative Market, or my personal go-to: Creative Fabrica.

How to Upload Fonts in PowerPoint

Ok, now let’s jump into the tutorial. I am going to choose a font in Creative Fabrica and show you how to upload it step-by-step using screenshots. (These screenshots are taken on a PC, so things will look slightly different if you are a MAC user.)

1. Choose a Font

Heading over to Creative Fabrica, I browse their fonts and find one I want to use. In this instance, we’re going to select Simple House.

choose font

2. Download the Font

When you click the font you like, there will be an option to purchase or download the font depending on whether what you chose is free or for purchase. Since I have a monthly subscription that allows me unlimited downloads, I only need to download it.

When you select download, if you have a PC it should start downloading in the bottom left corner.

download font

3. Open your Zipped File

Once your new font is downloaded, head into your “downloads” folder (or click on the downloaded file in the bottom left corner) where you will find a zipped file with the name of your font.

open the zipped file

Right-click on the zipped file and select “Open”.

open the font file

4. Install the Font

When you open your zipped file, there may be a few files inside, depending on what the font creator included in their font design. (For example, if your font comes in plain and bold, there’ll be a file for each.) In this example, there’s only one, so I double-click the file with the font name on it.

Choose the font file

This will open up the font package. In the top left corner is the “Install” button which you will select and a loading window should pop up, like in the pic below.

install the font

5. Design with your New Font

Once you have installed your new font using the steps above, open PowerPoint and add a text box. This will open up the text formatting options where you will find the drop-down font menu. You can either type in the name of your new font in the font search bar or scroll down until you find it. Select it.

find the new font in PowerPoint

If you already had PowerPoint open while you were downloading your font, you will need to close the program down and reopen it before the new font will appear. Don’t forget to save your work as a PowerPoint Presentation before you do!

Conclusion

Uploading a font in PowerPoint is pretty easy, now that you know how to do it. I hope this opens up a whole new avenue of creativity for you. Happy creating!

Related Articles

How to Change Sizes in PowerPoint

Uploading Graphics in PowerPoint Tutorial

PowerPoint Walk-Through

How can I Benefit from Making Printables?

how to install new fonts in powerpointhow to make printables in powerpoint
blog author image

Kimberly McGraw

Kimberly McGraw is an author and online content creator, dedicated to sharing helpful tips with her readers. As a devoted wife and mother of three, she draws inspiration from her daily life to create heartfelt and relatable stories. Her writing reflects her deep commitment to her faith and her passion for encouraging mothers on their own journeys.

Back to Blog

Self Care

different types of fonts displayed

Boring Fonts No More: Spice Up Your PowerPoint with New Styles!

November 03, 20223 min read

PowerPoint has tons of awesome fonts to choose from in their software, but when you are a creator and making a very specific design, you’re going to want a unique font to match. That’s when you go online and buy one you love, but then what? How do you get that font uploaded onto PowerPoint?

In this post, I’m going to walk you through the pretty easy process using screenshots, but first, if you aren’t sure where to get fonts in the first place, let me give you a couple of places I use.

(I sometimes include affiliate links, which means I might make a small commission off any purchases you make, at no additional cost to you. You can read my full disclosure here.)

For free fonts, Font Squirrel is a great resource. I would check there first. But if you just aren’t finding that perfect font, there are hundreds of unique fonts found on Etsy, Creative Market, or my personal go-to: Creative Fabrica.

How to Upload Fonts in PowerPoint

Ok, now let’s jump into the tutorial. I am going to choose a font in Creative Fabrica and show you how to upload it step-by-step using screenshots. (These screenshots are taken on a PC, so things will look slightly different if you are a MAC user.)

1. Choose a Font

Heading over to Creative Fabrica, I browse their fonts and find one I want to use. In this instance, we’re going to select Simple House.

choose font

2. Download the Font

When you click the font you like, there will be an option to purchase or download the font depending on whether what you chose is free or for purchase. Since I have a monthly subscription that allows me unlimited downloads, I only need to download it.

When you select download, if you have a PC it should start downloading in the bottom left corner.

download font

3. Open your Zipped File

Once your new font is downloaded, head into your “downloads” folder (or click on the downloaded file in the bottom left corner) where you will find a zipped file with the name of your font.

open the zipped file

Right-click on the zipped file and select “Open”.

open the font file

4. Install the Font

When you open your zipped file, there may be a few files inside, depending on what the font creator included in their font design. (For example, if your font comes in plain and bold, there’ll be a file for each.) In this example, there’s only one, so I double-click the file with the font name on it.

Choose the font file

This will open up the font package. In the top left corner is the “Install” button which you will select and a loading window should pop up, like in the pic below.

install the font

5. Design with your New Font

Once you have installed your new font using the steps above, open PowerPoint and add a text box. This will open up the text formatting options where you will find the drop-down font menu. You can either type in the name of your new font in the font search bar or scroll down until you find it. Select it.

find the new font in PowerPoint

If you already had PowerPoint open while you were downloading your font, you will need to close the program down and reopen it before the new font will appear. Don’t forget to save your work as a PowerPoint Presentation before you do!

Conclusion

Uploading a font in PowerPoint is pretty easy, now that you know how to do it. I hope this opens up a whole new avenue of creativity for you. Happy creating!

Related Articles

How to Change Sizes in PowerPoint

Uploading Graphics in PowerPoint Tutorial

PowerPoint Walk-Through

How can I Benefit from Making Printables?

how to install new fonts in powerpointhow to make printables in powerpoint
blog author image

Kimberly McGraw

Kimberly McGraw is an author and online content creator, dedicated to sharing helpful tips with her readers. As a devoted wife and mother of three, she draws inspiration from her daily life to create heartfelt and relatable stories. Her writing reflects her deep commitment to her faith and her passion for encouraging mothers on their own journeys.

Back to Blog

Healthy Living

different types of fonts displayed

Boring Fonts No More: Spice Up Your PowerPoint with New Styles!

November 03, 20223 min read

PowerPoint has tons of awesome fonts to choose from in their software, but when you are a creator and making a very specific design, you’re going to want a unique font to match. That’s when you go online and buy one you love, but then what? How do you get that font uploaded onto PowerPoint?

In this post, I’m going to walk you through the pretty easy process using screenshots, but first, if you aren’t sure where to get fonts in the first place, let me give you a couple of places I use.

(I sometimes include affiliate links, which means I might make a small commission off any purchases you make, at no additional cost to you. You can read my full disclosure here.)

For free fonts, Font Squirrel is a great resource. I would check there first. But if you just aren’t finding that perfect font, there are hundreds of unique fonts found on Etsy, Creative Market, or my personal go-to: Creative Fabrica.

How to Upload Fonts in PowerPoint

Ok, now let’s jump into the tutorial. I am going to choose a font in Creative Fabrica and show you how to upload it step-by-step using screenshots. (These screenshots are taken on a PC, so things will look slightly different if you are a MAC user.)

1. Choose a Font

Heading over to Creative Fabrica, I browse their fonts and find one I want to use. In this instance, we’re going to select Simple House.

choose font

2. Download the Font

When you click the font you like, there will be an option to purchase or download the font depending on whether what you chose is free or for purchase. Since I have a monthly subscription that allows me unlimited downloads, I only need to download it.

When you select download, if you have a PC it should start downloading in the bottom left corner.

download font

3. Open your Zipped File

Once your new font is downloaded, head into your “downloads” folder (or click on the downloaded file in the bottom left corner) where you will find a zipped file with the name of your font.

open the zipped file

Right-click on the zipped file and select “Open”.

open the font file

4. Install the Font

When you open your zipped file, there may be a few files inside, depending on what the font creator included in their font design. (For example, if your font comes in plain and bold, there’ll be a file for each.) In this example, there’s only one, so I double-click the file with the font name on it.

Choose the font file

This will open up the font package. In the top left corner is the “Install” button which you will select and a loading window should pop up, like in the pic below.

install the font

5. Design with your New Font

Once you have installed your new font using the steps above, open PowerPoint and add a text box. This will open up the text formatting options where you will find the drop-down font menu. You can either type in the name of your new font in the font search bar or scroll down until you find it. Select it.

find the new font in PowerPoint

If you already had PowerPoint open while you were downloading your font, you will need to close the program down and reopen it before the new font will appear. Don’t forget to save your work as a PowerPoint Presentation before you do!

Conclusion

Uploading a font in PowerPoint is pretty easy, now that you know how to do it. I hope this opens up a whole new avenue of creativity for you. Happy creating!

Related Articles

How to Change Sizes in PowerPoint

Uploading Graphics in PowerPoint Tutorial

PowerPoint Walk-Through

How can I Benefit from Making Printables?

how to install new fonts in powerpointhow to make printables in powerpoint
blog author image

Kimberly McGraw

Kimberly McGraw is an author and online content creator, dedicated to sharing helpful tips with her readers. As a devoted wife and mother of three, she draws inspiration from her daily life to create heartfelt and relatable stories. Her writing reflects her deep commitment to her faith and her passion for encouraging mothers on their own journeys.

Back to Blog

Keeping a Home

different types of fonts displayed

Boring Fonts No More: Spice Up Your PowerPoint with New Styles!

November 03, 20223 min read

PowerPoint has tons of awesome fonts to choose from in their software, but when you are a creator and making a very specific design, you’re going to want a unique font to match. That’s when you go online and buy one you love, but then what? How do you get that font uploaded onto PowerPoint?

In this post, I’m going to walk you through the pretty easy process using screenshots, but first, if you aren’t sure where to get fonts in the first place, let me give you a couple of places I use.

(I sometimes include affiliate links, which means I might make a small commission off any purchases you make, at no additional cost to you. You can read my full disclosure here.)

For free fonts, Font Squirrel is a great resource. I would check there first. But if you just aren’t finding that perfect font, there are hundreds of unique fonts found on Etsy, Creative Market, or my personal go-to: Creative Fabrica.

How to Upload Fonts in PowerPoint

Ok, now let’s jump into the tutorial. I am going to choose a font in Creative Fabrica and show you how to upload it step-by-step using screenshots. (These screenshots are taken on a PC, so things will look slightly different if you are a MAC user.)

1. Choose a Font

Heading over to Creative Fabrica, I browse their fonts and find one I want to use. In this instance, we’re going to select Simple House.

choose font

2. Download the Font

When you click the font you like, there will be an option to purchase or download the font depending on whether what you chose is free or for purchase. Since I have a monthly subscription that allows me unlimited downloads, I only need to download it.

When you select download, if you have a PC it should start downloading in the bottom left corner.

download font

3. Open your Zipped File

Once your new font is downloaded, head into your “downloads” folder (or click on the downloaded file in the bottom left corner) where you will find a zipped file with the name of your font.

open the zipped file

Right-click on the zipped file and select “Open”.

open the font file

4. Install the Font

When you open your zipped file, there may be a few files inside, depending on what the font creator included in their font design. (For example, if your font comes in plain and bold, there’ll be a file for each.) In this example, there’s only one, so I double-click the file with the font name on it.

Choose the font file

This will open up the font package. In the top left corner is the “Install” button which you will select and a loading window should pop up, like in the pic below.

install the font

5. Design with your New Font

Once you have installed your new font using the steps above, open PowerPoint and add a text box. This will open up the text formatting options where you will find the drop-down font menu. You can either type in the name of your new font in the font search bar or scroll down until you find it. Select it.

find the new font in PowerPoint

If you already had PowerPoint open while you were downloading your font, you will need to close the program down and reopen it before the new font will appear. Don’t forget to save your work as a PowerPoint Presentation before you do!

Conclusion

Uploading a font in PowerPoint is pretty easy, now that you know how to do it. I hope this opens up a whole new avenue of creativity for you. Happy creating!

Related Articles

How to Change Sizes in PowerPoint

Uploading Graphics in PowerPoint Tutorial

PowerPoint Walk-Through

How can I Benefit from Making Printables?

how to install new fonts in powerpointhow to make printables in powerpoint
blog author image

Kimberly McGraw

Kimberly McGraw is an author and online content creator, dedicated to sharing helpful tips with her readers. As a devoted wife and mother of three, she draws inspiration from her daily life to create heartfelt and relatable stories. Her writing reflects her deep commitment to her faith and her passion for encouraging mothers on their own journeys.

Back to Blog

Money Matters

different types of fonts displayed

Boring Fonts No More: Spice Up Your PowerPoint with New Styles!

November 03, 20223 min read

PowerPoint has tons of awesome fonts to choose from in their software, but when you are a creator and making a very specific design, you’re going to want a unique font to match. That’s when you go online and buy one you love, but then what? How do you get that font uploaded onto PowerPoint?

In this post, I’m going to walk you through the pretty easy process using screenshots, but first, if you aren’t sure where to get fonts in the first place, let me give you a couple of places I use.

(I sometimes include affiliate links, which means I might make a small commission off any purchases you make, at no additional cost to you. You can read my full disclosure here.)

For free fonts, Font Squirrel is a great resource. I would check there first. But if you just aren’t finding that perfect font, there are hundreds of unique fonts found on Etsy, Creative Market, or my personal go-to: Creative Fabrica.

How to Upload Fonts in PowerPoint

Ok, now let’s jump into the tutorial. I am going to choose a font in Creative Fabrica and show you how to upload it step-by-step using screenshots. (These screenshots are taken on a PC, so things will look slightly different if you are a MAC user.)

1. Choose a Font

Heading over to Creative Fabrica, I browse their fonts and find one I want to use. In this instance, we’re going to select Simple House.

choose font

2. Download the Font

When you click the font you like, there will be an option to purchase or download the font depending on whether what you chose is free or for purchase. Since I have a monthly subscription that allows me unlimited downloads, I only need to download it.

When you select download, if you have a PC it should start downloading in the bottom left corner.

download font

3. Open your Zipped File

Once your new font is downloaded, head into your “downloads” folder (or click on the downloaded file in the bottom left corner) where you will find a zipped file with the name of your font.

open the zipped file

Right-click on the zipped file and select “Open”.

open the font file

4. Install the Font

When you open your zipped file, there may be a few files inside, depending on what the font creator included in their font design. (For example, if your font comes in plain and bold, there’ll be a file for each.) In this example, there’s only one, so I double-click the file with the font name on it.

Choose the font file

This will open up the font package. In the top left corner is the “Install” button which you will select and a loading window should pop up, like in the pic below.

install the font

5. Design with your New Font

Once you have installed your new font using the steps above, open PowerPoint and add a text box. This will open up the text formatting options where you will find the drop-down font menu. You can either type in the name of your new font in the font search bar or scroll down until you find it. Select it.

find the new font in PowerPoint

If you already had PowerPoint open while you were downloading your font, you will need to close the program down and reopen it before the new font will appear. Don’t forget to save your work as a PowerPoint Presentation before you do!

Conclusion

Uploading a font in PowerPoint is pretty easy, now that you know how to do it. I hope this opens up a whole new avenue of creativity for you. Happy creating!

Related Articles

How to Change Sizes in PowerPoint

Uploading Graphics in PowerPoint Tutorial

PowerPoint Walk-Through

How can I Benefit from Making Printables?

how to install new fonts in powerpointhow to make printables in powerpoint
blog author image

Kimberly McGraw

Kimberly McGraw is an author and online content creator, dedicated to sharing helpful tips with her readers. As a devoted wife and mother of three, she draws inspiration from her daily life to create heartfelt and relatable stories. Her writing reflects her deep commitment to her faith and her passion for encouraging mothers on their own journeys.

Back to Blog

Travel

different types of fonts displayed

Boring Fonts No More: Spice Up Your PowerPoint with New Styles!

November 03, 20223 min read

PowerPoint has tons of awesome fonts to choose from in their software, but when you are a creator and making a very specific design, you’re going to want a unique font to match. That’s when you go online and buy one you love, but then what? How do you get that font uploaded onto PowerPoint?

In this post, I’m going to walk you through the pretty easy process using screenshots, but first, if you aren’t sure where to get fonts in the first place, let me give you a couple of places I use.

(I sometimes include affiliate links, which means I might make a small commission off any purchases you make, at no additional cost to you. You can read my full disclosure here.)

For free fonts, Font Squirrel is a great resource. I would check there first. But if you just aren’t finding that perfect font, there are hundreds of unique fonts found on Etsy, Creative Market, or my personal go-to: Creative Fabrica.

How to Upload Fonts in PowerPoint

Ok, now let’s jump into the tutorial. I am going to choose a font in Creative Fabrica and show you how to upload it step-by-step using screenshots. (These screenshots are taken on a PC, so things will look slightly different if you are a MAC user.)

1. Choose a Font

Heading over to Creative Fabrica, I browse their fonts and find one I want to use. In this instance, we’re going to select Simple House.

choose font

2. Download the Font

When you click the font you like, there will be an option to purchase or download the font depending on whether what you chose is free or for purchase. Since I have a monthly subscription that allows me unlimited downloads, I only need to download it.

When you select download, if you have a PC it should start downloading in the bottom left corner.

download font

3. Open your Zipped File

Once your new font is downloaded, head into your “downloads” folder (or click on the downloaded file in the bottom left corner) where you will find a zipped file with the name of your font.

open the zipped file

Right-click on the zipped file and select “Open”.

open the font file

4. Install the Font

When you open your zipped file, there may be a few files inside, depending on what the font creator included in their font design. (For example, if your font comes in plain and bold, there’ll be a file for each.) In this example, there’s only one, so I double-click the file with the font name on it.

Choose the font file

This will open up the font package. In the top left corner is the “Install” button which you will select and a loading window should pop up, like in the pic below.

install the font

5. Design with your New Font

Once you have installed your new font using the steps above, open PowerPoint and add a text box. This will open up the text formatting options where you will find the drop-down font menu. You can either type in the name of your new font in the font search bar or scroll down until you find it. Select it.

find the new font in PowerPoint

If you already had PowerPoint open while you were downloading your font, you will need to close the program down and reopen it before the new font will appear. Don’t forget to save your work as a PowerPoint Presentation before you do!

Conclusion

Uploading a font in PowerPoint is pretty easy, now that you know how to do it. I hope this opens up a whole new avenue of creativity for you. Happy creating!

Related Articles

How to Change Sizes in PowerPoint

Uploading Graphics in PowerPoint Tutorial

PowerPoint Walk-Through

How can I Benefit from Making Printables?

how to install new fonts in powerpointhow to make printables in powerpoint
blog author image

Kimberly McGraw

Kimberly McGraw is an author and online content creator, dedicated to sharing helpful tips with her readers. As a devoted wife and mother of three, she draws inspiration from her daily life to create heartfelt and relatable stories. Her writing reflects her deep commitment to her faith and her passion for encouraging mothers on their own journeys.

Back to Blog

DIY Projects

different types of fonts displayed

Boring Fonts No More: Spice Up Your PowerPoint with New Styles!

November 03, 20223 min read

PowerPoint has tons of awesome fonts to choose from in their software, but when you are a creator and making a very specific design, you’re going to want a unique font to match. That’s when you go online and buy one you love, but then what? How do you get that font uploaded onto PowerPoint?

In this post, I’m going to walk you through the pretty easy process using screenshots, but first, if you aren’t sure where to get fonts in the first place, let me give you a couple of places I use.

(I sometimes include affiliate links, which means I might make a small commission off any purchases you make, at no additional cost to you. You can read my full disclosure here.)

For free fonts, Font Squirrel is a great resource. I would check there first. But if you just aren’t finding that perfect font, there are hundreds of unique fonts found on Etsy, Creative Market, or my personal go-to: Creative Fabrica.

How to Upload Fonts in PowerPoint

Ok, now let’s jump into the tutorial. I am going to choose a font in Creative Fabrica and show you how to upload it step-by-step using screenshots. (These screenshots are taken on a PC, so things will look slightly different if you are a MAC user.)

1. Choose a Font

Heading over to Creative Fabrica, I browse their fonts and find one I want to use. In this instance, we’re going to select Simple House.

choose font

2. Download the Font

When you click the font you like, there will be an option to purchase or download the font depending on whether what you chose is free or for purchase. Since I have a monthly subscription that allows me unlimited downloads, I only need to download it.

When you select download, if you have a PC it should start downloading in the bottom left corner.

download font

3. Open your Zipped File

Once your new font is downloaded, head into your “downloads” folder (or click on the downloaded file in the bottom left corner) where you will find a zipped file with the name of your font.

open the zipped file

Right-click on the zipped file and select “Open”.

open the font file

4. Install the Font

When you open your zipped file, there may be a few files inside, depending on what the font creator included in their font design. (For example, if your font comes in plain and bold, there’ll be a file for each.) In this example, there’s only one, so I double-click the file with the font name on it.

Choose the font file

This will open up the font package. In the top left corner is the “Install” button which you will select and a loading window should pop up, like in the pic below.

install the font

5. Design with your New Font

Once you have installed your new font using the steps above, open PowerPoint and add a text box. This will open up the text formatting options where you will find the drop-down font menu. You can either type in the name of your new font in the font search bar or scroll down until you find it. Select it.

find the new font in PowerPoint

If you already had PowerPoint open while you were downloading your font, you will need to close the program down and reopen it before the new font will appear. Don’t forget to save your work as a PowerPoint Presentation before you do!

Conclusion

Uploading a font in PowerPoint is pretty easy, now that you know how to do it. I hope this opens up a whole new avenue of creativity for you. Happy creating!

Related Articles

How to Change Sizes in PowerPoint

Uploading Graphics in PowerPoint Tutorial

PowerPoint Walk-Through

How can I Benefit from Making Printables?

how to install new fonts in powerpointhow to make printables in powerpoint
blog author image

Kimberly McGraw

Kimberly McGraw is an author and online content creator, dedicated to sharing helpful tips with her readers. As a devoted wife and mother of three, she draws inspiration from her daily life to create heartfelt and relatable stories. Her writing reflects her deep commitment to her faith and her passion for encouraging mothers on their own journeys.

Back to Blog

Free Printables

different types of fonts displayed

Boring Fonts No More: Spice Up Your PowerPoint with New Styles!

November 03, 20223 min read

PowerPoint has tons of awesome fonts to choose from in their software, but when you are a creator and making a very specific design, you’re going to want a unique font to match. That’s when you go online and buy one you love, but then what? How do you get that font uploaded onto PowerPoint?

In this post, I’m going to walk you through the pretty easy process using screenshots, but first, if you aren’t sure where to get fonts in the first place, let me give you a couple of places I use.

(I sometimes include affiliate links, which means I might make a small commission off any purchases you make, at no additional cost to you. You can read my full disclosure here.)

For free fonts, Font Squirrel is a great resource. I would check there first. But if you just aren’t finding that perfect font, there are hundreds of unique fonts found on Etsy, Creative Market, or my personal go-to: Creative Fabrica.

How to Upload Fonts in PowerPoint

Ok, now let’s jump into the tutorial. I am going to choose a font in Creative Fabrica and show you how to upload it step-by-step using screenshots. (These screenshots are taken on a PC, so things will look slightly different if you are a MAC user.)

1. Choose a Font

Heading over to Creative Fabrica, I browse their fonts and find one I want to use. In this instance, we’re going to select Simple House.

choose font

2. Download the Font

When you click the font you like, there will be an option to purchase or download the font depending on whether what you chose is free or for purchase. Since I have a monthly subscription that allows me unlimited downloads, I only need to download it.

When you select download, if you have a PC it should start downloading in the bottom left corner.

download font

3. Open your Zipped File

Once your new font is downloaded, head into your “downloads” folder (or click on the downloaded file in the bottom left corner) where you will find a zipped file with the name of your font.

open the zipped file

Right-click on the zipped file and select “Open”.

open the font file

4. Install the Font

When you open your zipped file, there may be a few files inside, depending on what the font creator included in their font design. (For example, if your font comes in plain and bold, there’ll be a file for each.) In this example, there’s only one, so I double-click the file with the font name on it.

Choose the font file

This will open up the font package. In the top left corner is the “Install” button which you will select and a loading window should pop up, like in the pic below.

install the font

5. Design with your New Font

Once you have installed your new font using the steps above, open PowerPoint and add a text box. This will open up the text formatting options where you will find the drop-down font menu. You can either type in the name of your new font in the font search bar or scroll down until you find it. Select it.

find the new font in PowerPoint

If you already had PowerPoint open while you were downloading your font, you will need to close the program down and reopen it before the new font will appear. Don’t forget to save your work as a PowerPoint Presentation before you do!

Conclusion

Uploading a font in PowerPoint is pretty easy, now that you know how to do it. I hope this opens up a whole new avenue of creativity for you. Happy creating!

Related Articles

How to Change Sizes in PowerPoint

Uploading Graphics in PowerPoint Tutorial

PowerPoint Walk-Through

How can I Benefit from Making Printables?

how to install new fonts in powerpointhow to make printables in powerpoint
blog author image

Kimberly McGraw

Kimberly McGraw is an author and online content creator, dedicated to sharing helpful tips with her readers. As a devoted wife and mother of three, she draws inspiration from her daily life to create heartfelt and relatable stories. Her writing reflects her deep commitment to her faith and her passion for encouraging mothers on their own journeys.

Back to Blog